skip to main |
skip to sidebar
Unlike life's other great mysteries, this one can be cleared up now (well, except for one). I'm speaking of course of the first Mystery Objects post last week. THANKS to all of you for putting such brow-furrowed intensity (not to mention hilarious flights of fancy) into your study of these objects.
Here are the answers to the pictorial puzzles.
#1: This may be one of my favorite found objects in all my years of collecting, which is why it was first in the line-up. Congrats to Jo for guessing this almost exactly: it is a baby's plastic rattle, picked off of a chipboard floor after a fire. It has an unbelievably organic, hide-like appearance, until you pick it up and it weighs practically nothing, and still rattles. Excellent that it inspired a dream, Laura.
#2: This one eluded everyone. It's so beautiful, it's hard to imagine it's as mundane an object as it is. I picked this up off the street as I was crossing at a light one day. if you turn your orientation - that is, tilt your head to the left, it will be easier to read as the plastic handle off a paper shopping bag, with one side separated from the cardboard stapled inner support. The Asian quality to this object makes its real identity harder to parse. I adore this thing.
#3: Some of you got close, but no-one pegged it exactly. It is indeed a gasket of sorts. But it came off of a very old 1920's vacuum-cleaner bag. I've saved this for years hoping it would work its way into some eyewear.
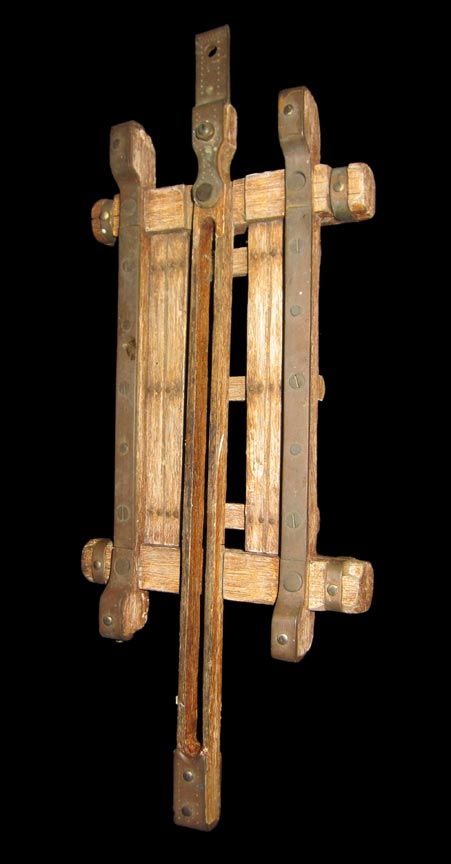
#4: This one remains a total mystery to me. I bought it at an antique store here in Sydney about 6 months ago, and it was sold by a dealer who specialised in old childrens' toys. The long vertical slotted bit is loose but doesn't lift or swing too much. I just can't work this out - the closest I can guess is it's part of a handmade scale model of a catapult. I hope someone can prove me wrong….!
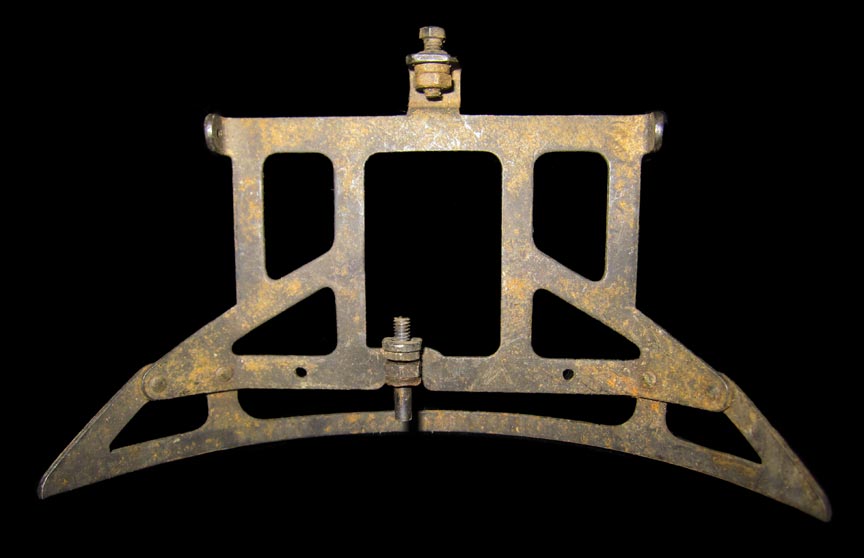
#5: Part of the inner carriage of a very old typewriter - it mounted somewhere behind the array of key arms.
#6: Most of you got this one - a rubber foot pedal cover from an old car - likely the emergency brake. I love what a graphically strong object it is when removed from its context. Can't wait to utilise this.
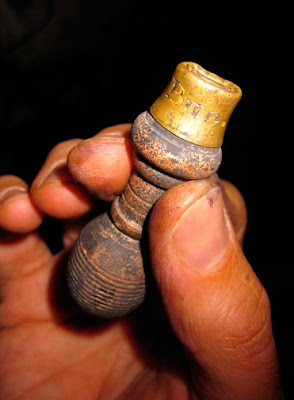
#7: Congrats go to Priscilla Moore for nailing this one. She emailed her guess to me, and even included a picture as backup - nice! It's a cattle tag, as shown.

I'll put up my next grouping tomorrow, so check back then.
And keep emailing me your own mystery objects - there are some real beauties - stiff competition!
Keith
All this pottering around in my lair pawing through amazing objects has given me two good ideas.
Number one: Below, I'm posting the first in a series of wonderfully mysterious objects - these are objects that have excited and baffled me. In fact, there's one below that I still know nothing about (maybe someone will illuminate me!). I am not saying what these are, but would love you to post, in order of appearance, what you believe them to be. I will include approximate sizes (Also, the first object is shown from three sides; the rest have single images). Click on them to view each one large.
I've shown the first two objects in past workshops to illustrate a discussion about mystery and identity, so some of you know what they are - don't post what they are if you're one of those people!
My next posting, next week, will disclose the answers, so you can check how you did.
Number two: Here's an OPEN CALL to all you collectors of bits and bobs out there. Email me images of your most mysterious object/s (email to keith AT lobue-art DOT com) with the subject heading MYSTERY OBJECTS. I will post selected ones to the blog and the guessing game will continue.
The person who emails me the most amazing and mysterious object will receive a FREE COPY of my new DVD 'Oneirocritica: The Found-Object Sculpture of Keith Lo Bue' upon completion. I'll be judging purely by the object, so no favorites will be played.
Good luck and happy fossicking (non-Australians, look that one up).
And now without further ado, I give you the first parade of mystery...

 #1: Approx. 3 1/2" (9cm) tall
 #2: Approx. 8" x 7" (20.5 x 18cm)
 #3: Approx. 7" (18cm) wide
 #4: Approx. 10" x 4" (25.5 x 10cm)
 #5: Approx. 5" (13cm) wide
 #6: Approx. 3" x 2" (8 x 5cm)
 #7: Approx. 3.5" x 3" (9 x 8cm)Let the games begin. And taking images from you now...
Keith
One of the true pleasures about traveling to teach workshops is that I can return, all fired up, to my own studio at the end of it all.
As I prepare myself to make a few major new pieces for my upcoming exhibition in Hervey Bay, AU, I took up the enjoyable task of creating a few hammers, using a pair of antique hammer heads purchased on eBay during my trip.


This was a great way to get back in the groove, and in one case, the experience yielded a tool I'll be making extensive use of. Here are a few in-progress shots of these tools being made.
 Sifting through a few new goodies, some of which I scored in the US last month. The left object is a 200 year old bronze finial - which feels perfect as a handle.
 Using square nickel wire that I twisted as the upper part of the handle allowed me to solder a bronze gas valve, about 150 years old, into place as the middle area where my thumb and index finger would rest.
 Trimming the block of brass I made for the eye of the hammer - the part that keeps the head in place. Since I didn't have a chunk of brass that thick, I had to sweat-solder 5 sheets of 16-gauge brass together, as seen below.
 This chunk was to be used for both hammers. I used brass because I own a Victorian watchmaker's riveting hammer that is my absolute favorite tool in the world (and can be seen at the top of this page on my site, FYI) - this was in homage to that good little friend.
 Fabricating a little handle-cap out of brass tubing that I've shaped to contour to the bronze handle. No, that's not blood on my hands - I'd just used asphaltum as resist for my etching, and it stains fingers and makes them look really horrible. Ah well, the hand-modeling career was a pipe-dream anyway.
 Cap in place. And here are a few images of the completed riveting hammer.


 The little cap on the bottom is one of the few remaining upholstery tacks in this style I have left - look familiar? These were scanned for my website's homepage as the green buttons to navigate the menu - love these little chipped tacks.
 I love the heft of this tool, and it really fits my hand well - the ball of the handle rests in the flesh of my palm, while the valve can be gently gripped by my thumb to help steady the hammer. Can you tell I love tools?
 The second hammer became a much more straight-forward design - a nice little tool, but doesn't have the pizazz of the first. Here I had just finished resurfacing the striking face, but hadn't yet roughed up the front sides, or cheeks.
 Filing and grinding the block into the proper tapered oval shape needed.
 fitting the block to the head, and readying to solder the brass to the twisted wire.
 I chose an old ice-pick handle for this hammer. Notice the deteriorated lettering on one side that reads, in beautiful pre-refridgerator adspeak: 'Air Condition Your Food.' A quick Googling unearthed this gem from a 1939 newspaper.
 Number two, done. No excuses now not to get in there and use them both in my new work, which, um, stay tuned for. Boy, it feels good to be back at it. Check back next week for an update.
Thanks for stoppin' by.


 #8: Approx. 1" (3cm)
 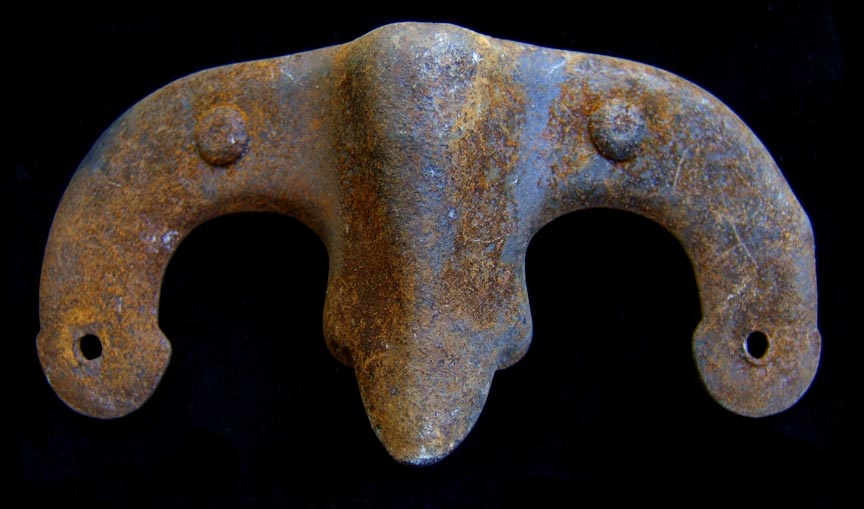 #9: Approx. 5" (12cm)
  #10: Approx. 3" (7.5cm)
 #11: Approx. 3" (7.5cm)
 #12: Approx. 8" (20cm)
 #13: Approx. 2" (4.5cm)
 #14: Approx. 2" (4.5cm)