Sunday, June 19, 2011

To the Invisible Girl, in-progress - Part Two.

I'm leaving in a few hours to teach in Brisbane, but I have just enough time to get Part Two in gear...

When last we met, I ran into a problem with the arrangement of the drawer-pull (see last post). As soon as I rotated the pull so the connection was UNDER the lens, the entire piece came to life. Now I would be able to come up with an interesting bit of visual action in the center of the sole.

Laid in place to get the design right. Now the curve of the handle echoes the rounded heel - why didn't I think of that first time around? Guess that's why I made the 'mistake.'

 The pinion point poking through the bottom.

The original hole will receive another element later on - no worries there.

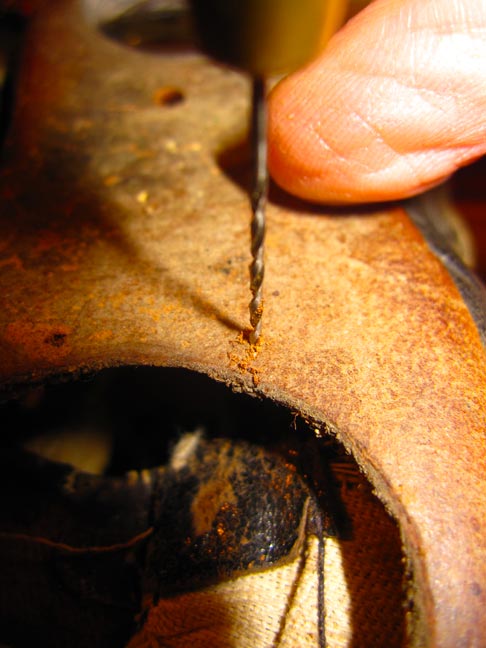
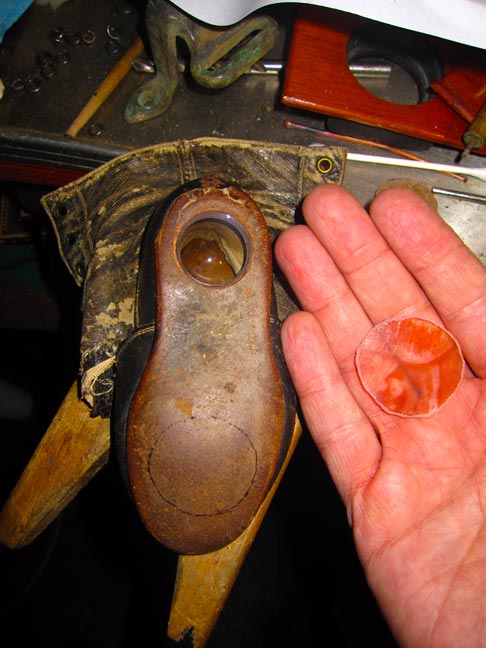
With all the work being done on the shoe, I've got to turn my attention now to securing the fused-glass portrait down at the toe. First holes are carefully drilled around the perimeter...

...and holes are drilled in the shoe leather.

 Sewing begins.


I love how the face isn't visible, and won't be, until I back it with black velvet later on.

With that finished, it's back to the heel. Seizing on the opportunity to use my new interest in kumihimo, I decide to try it out in situ...

 1920's linen thread - beautiful stuff.
 Ready to braid.

 I'm not sure this will work like this, but it's managing so far.

 Wow - I'm going to employ this again for sure.

 The ends get splayed out asymmetrically and run into the shoe.
 
The thread is anchored around the steel frame for strength and tension.


 The drawer-pull is locked flat with labradorite beads and thread, and a stunning raw peridot occupies the original hole at the top.


Ready to attack the inside chambers... and perhaps a great time to find a title that fits the shoe, as it were.


Come back soon!
Keith

Tuesday, June 14, 2011

To the Invisible Girl, in-progress - Part One.

Welcome back. I've been working on a neckpiece, still unfinished at this moment... But by the time we get to part two I should be done. 

Let's take it from the top.

The launch-point:
A tiny Victorian leather boot.


 I make the decision early on to view it from the sole (soul?). A lens is found that will be inserted into the heel.


 Ripping the seams a bit gives me a set of wing-like leather flaps to vignette the sole.


Now the toe will house a fused-glass image I did previously in the kiln. This is a daguerreotype image of a girl from 1840.


 Tacked into place. I will drill the glass out later and tie it in.


 Now I'm adding eyelets to secure the leather sides in a splayed position.


 So as not to put too much stress on the old and brittle leather, I create a frame out of 8-gauge steel to line inside the shoe.


With a curved upholstery needle, I sew it into place with heavy waxed linen thread.


 On now to work on a way to protect the heel-mounted lens. This very old drawer-pull has the perfect circumference to frame the lens while offering protection.


 But first I'll need to grind off the riveted base.


 Freedom.


 Since the swivel would place the handle too far out from the shoe, I decide to cut it down lower. But first, this rusty steel pin must get ground and punched out to release the handle.


 Tapping the pin out...


 Slow work, but it's coming out.


 Ready to cut down to a thinner profile.


 Holding it up to see the fit.


The hole is drilled out, the pivot-point pushed through - and a nasty surprise reveals itself - because the heel rounds off in back, it throws the drawer handle out at an angle - no way to sit it flat against the shoe.


Stay tuned next time for the workaround...

Keith