One of my New Year's resolutions has been to dig deep into my trove of treasures, and to pull out those things I've coveted but held back for something 'special.' Turning 50 in January has brought home what I knew intuitively all along:
It's all special.
So out comes one such piece ready for transforming:
An 1890's swivel locket by Pinchbeck. I'm determined to use the original ambrotype portrait within as part of the final piece.
Ambrotypes are emulsion on glass, and must be backed with black for the image to be seen as a positive.
Checking out the swivel action.
The missing side, lost to time.
Out comes the ambrotype... This one is indeed unique as it was hand-colored beautifully and subtly.
The black paint is scratched off the back of the glass, thereby making all parts of the image that would be black become transparent.
Leaving a bit of black behind the face to keep it readable from the front.
My title for the piece is now chosen and I fit it to the oval.
As these brooches were used as mourning pieces, usually enclosing hair of a loved one, I decide to plait a waxed-linen border around the image.
Turning my attention to the empty side, I settle on a spectacular gilt book cover from the early 1800's as my palette.
Cut and edge-painted, I then burrow two recesses to hold jewels.
Gorgeous opals peer out.
A resin lens is prepared and attached.
A brilliantly colored lithograph lends me the face to be seen under the lens.
Almost ready to attach.
First the back must be prepared, as I'll be able to see through the ambrotype to this side of the book cover. I choose some exquisite robe detailing from an 1830 engraving. This texture will reveal itself as the jacket detail of the photo portrait once it's in place.
To secure the glass ambrotype in place, I use more of the thick engraving paper as a 'washer' - this was a practice actually used during the period.
I'll have a shallow space for material to move behind the photo image. I choose to fill this space with tiny tourmalines and mustard seeds.
The edges of the book cover, which are beautifully dense cardboard, are hammered hard to round off the edges, giving the panel a finished quality I'm delighted with.
The panels all in place, the last step is to embellish the exterior frame of the brooch. I choose more of the crimson waxed linen thread, and it imbues the piece with a crude hand-hewn aura.
Now, if you'll saunter over and view the finished piece here.
Or, if you're feeling your oats, you can see how much it costs to wear it yourself here.
Thank you so much for looking and for your feedback below!
Keith
Showing posts with label brooch. Show all posts
Friday, February 21, 2014
Monday, June 4, 2012
Reflections, In-Progress - Part Three.
Hi all - let's pick it up where we left off in last post. This will see us through to the finish of a very meaningful piece for me to make.
A precious fragment of Early 19th-century map is attached to the back of the opaque glass, to be viewed through the fabricated binoculars lens I made.
The "jewel" to occupy the center space through the lens is this fantastic multicolored beetle specimen, from a collector in the Northern Territories of Australia circa 1975.
Testing it out under the lens, it becomes a beautiful focal point to this side of the piece. Here the bronze resin assembly has been patinated dark and as yet has not been polished to bring the metal out in the surface.
Pearls are mounted in the holes at the top and bottom and the assembly is attached to the body of the compact.
All is left to set and dry, so I have a few days to put my thoughts elsewhere.
I now turn back to the original clear resin panel I made right at the beginning of this project, with Maureen's baby hair embedded in it. I had fused two pieces of glass with her image, and turn to the second unused image in order to make what I think will be a companion to the neckpiece.
Cutting away the glass I don't need with my ring saw.
After beveling and shaping, it's ready to go.
I settle on this very large diameter antique pie plate as the body of what I'm sure now will be a brooch.
Getting out my aggressions with the rawhide mallet.
A chamber now lies in waiting for my fused glass photo.
A pin back is riveted in place.
In an odd lapse of routine, this is the last in-progress photo of this brooch being made... It can be seen completed via the link at the end of the post. Apologies!
Back to REFLECTIONS.
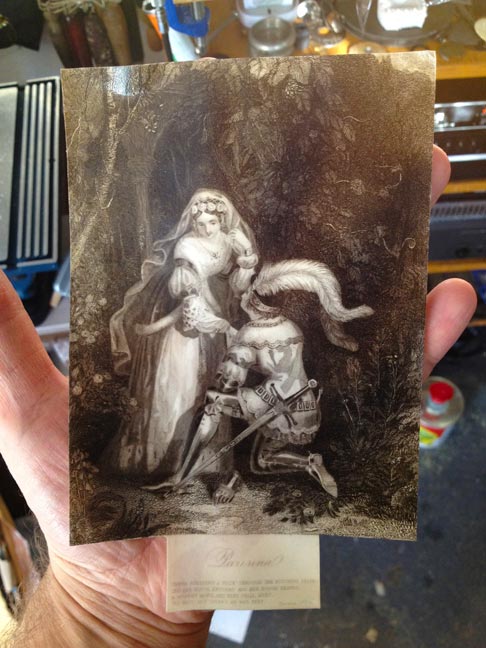
A stunning early steel engraving is chosen to occupy the niche I ground in the clay pipe.
It was glued into a mid-19th century scrapbook - so here it is being soaked off the large page.
Separated and ready to remove the part I need.
Her face is mounted to the back, and a "lens" of resin gives her face a dreamy detachment.
Turning to signing the artwork, I prepare to etch my name and date in a small recess at the bottom of the neckpiece.
Carefully inscribing my name.
...and ready to be etched.
The pendant and chain complete, I rivet the leather cord into an antique key, which has been modified to become the clasp of the neckpiece. At long last, after many weeks of work, it's complete.
Postscript: a few weeks after the piece was finished, in early May, it was presented to Maureen's daughter Felicity. I was lucky enough to be able to photograph her wearing both neckpiece and brooch - mother and daughter reflecting each others beauty. It was a totally moving experience. The modeled photos can be seen after the detail images of the finished objects at the links below.
*******
REFLECTIONS.
and
THE LAND OF DREAMS.
*******
Thank you so much for looking!
Keith
A precious fragment of Early 19th-century map is attached to the back of the opaque glass, to be viewed through the fabricated binoculars lens I made.
The "jewel" to occupy the center space through the lens is this fantastic multicolored beetle specimen, from a collector in the Northern Territories of Australia circa 1975.
Testing it out under the lens, it becomes a beautiful focal point to this side of the piece. Here the bronze resin assembly has been patinated dark and as yet has not been polished to bring the metal out in the surface.
Pearls are mounted in the holes at the top and bottom and the assembly is attached to the body of the compact.
All is left to set and dry, so I have a few days to put my thoughts elsewhere.
I now turn back to the original clear resin panel I made right at the beginning of this project, with Maureen's baby hair embedded in it. I had fused two pieces of glass with her image, and turn to the second unused image in order to make what I think will be a companion to the neckpiece.
Cutting away the glass I don't need with my ring saw.
After beveling and shaping, it's ready to go.
I settle on this very large diameter antique pie plate as the body of what I'm sure now will be a brooch.
Getting out my aggressions with the rawhide mallet.
A chamber now lies in waiting for my fused glass photo.
A pin back is riveted in place.
In an odd lapse of routine, this is the last in-progress photo of this brooch being made... It can be seen completed via the link at the end of the post. Apologies!
Back to REFLECTIONS.
A stunning early steel engraving is chosen to occupy the niche I ground in the clay pipe.
It was glued into a mid-19th century scrapbook - so here it is being soaked off the large page.
Separated and ready to remove the part I need.
Her face is mounted to the back, and a "lens" of resin gives her face a dreamy detachment.
Turning to signing the artwork, I prepare to etch my name and date in a small recess at the bottom of the neckpiece.
Carefully inscribing my name.
...and ready to be etched.
The pendant and chain complete, I rivet the leather cord into an antique key, which has been modified to become the clasp of the neckpiece. At long last, after many weeks of work, it's complete.
Postscript: a few weeks after the piece was finished, in early May, it was presented to Maureen's daughter Felicity. I was lucky enough to be able to photograph her wearing both neckpiece and brooch - mother and daughter reflecting each others beauty. It was a totally moving experience. The modeled photos can be seen after the detail images of the finished objects at the links below.
*******
REFLECTIONS.
and
THE LAND OF DREAMS.
*******
Thank you so much for looking!
Keith
Tuesday, April 19, 2011
Last 36 hours of Japan Fundraiser auction
Only 36 more hours to bid on my brooch (untitled - fork & tie) on the Lucky Charm site - all the money goes to Japan's Red Cross - bid it up and help out! An amazing array of contemporary jewellery there. Auction ends tomorrow (21 April) at 11PM EST, Sydney time...
http://luckycharmfundraiser.blogspot.com/2011/03/keith-lo-bue.html?utm_source=BP_recent
Labels:
brooch,
fork tie,
found object jewelry,
Japan earthquake
Subscribe to:
Posts (Atom)