Showing posts with label neckpiece. Show all posts

Monday, November 3, 2014

The Story of a Shadow, in progress.

During the taping of my latest online workshop entitled 'Getting Attached: Rivets Revealed' (to be held again next July, for those who want to join me then), I began this piece in order to demonstrate some creative riveting techniques on film. What resulted is The Story of a Shadow.

I begin the journey with a beautiful century-old Japanese book, to be treated as the vessel and starting point.


After sitting with it for a while, I spot an item in a 'Stuff' box that has been loitering for over two decades in my studio, so patiently waiting its turn. A silver trophy plaque.


Out comes the saw to make it fit the book.


Now the book is hollowed out to make a chamber.


The interior is built with the windows of the plaque in mind...


......and the book is clamped into a block.


The top of a dried pitcher from one of my carnivorous pitcher plants will be removed and used inside the book structure. The delicate ribs are captivating.


Washers are cut out of heavy brass sheet to make rivets that will secure the book shut.


One washer cut and shaped.

As much of this piece was made while being filmed, the body of the piece is completed without further still images.

The chain I decide on is a new one for me, made from heavy square steel wire. It's challenging to work with this wire because of its heavy gauge and the fact that it is half-hardened off the roll.


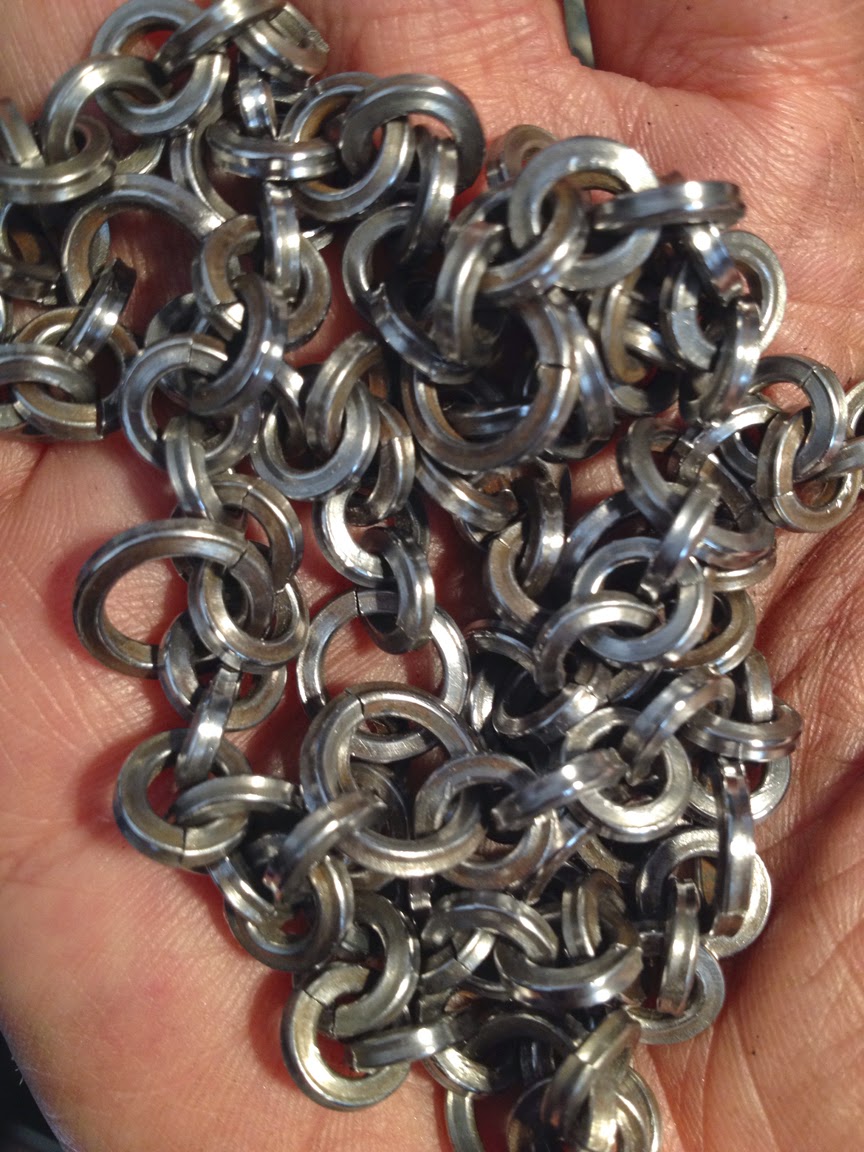


Hand-polished and ready to mount to the pendant.

Please visit my website to view the finished neckpiece here.

I'll be back in the studio soon for the next work!

Keith 


Monday, January 27, 2014

Four, and What They Did, In Progress.

There are pieces of artwork, once things are in full swing in Studio Stuffsmith, that seem to make themselves as I stand, conducting the players but bystander to the unexpected outcomes.

This is such a piece.

I select this magnificent steel spigot handle, layers of paint exposed through years of weathering the elements, and it sets me in motion. I've wanted to tuck into this particular object for about ten years, and this is the time to act on it. I also mentally take note of a very special object that I'd like to use as a 'chain', but it's too early to think about just yet.


The spigot handle is pretty heavy, so I decide to remove the center struts and therefore take half of the weight with it.


The removed element is beautiful on its own, and will be saved for a later opportunity. Rummaging through my trove, I carry my newly-liberated spigot with me to see what transpires.


It doesn't take long: a beach-worn aluminum bottom of a soda can, encrusted with fragments of sea life, catches my eye.


 I will never tire of this work, for it is this 'click' moment that energizes each act in the studio. The fit is exact, and they speak to each other like old friends.


And so they are lashed together, these survivors of the scrap heap.


 I then decide to make a chamber inside which I can build my composition, and it must be watertight, as I have the thought to encase the center in resin.


I select four of my precious 'gem' size tintypes from the 1860's, each one-of-a-kind image no bigger than a postage stamp.


Two men and two women, all from the same photo album (family? good friends?), who will also be tied to each other with thread.


As a central focus, this is so strong for me, that I stop and begin to search for a title. An hour or so later, I've found it, and it too is one I've hoped to use for many years.


Some epiphanies over the course of making shout loud and clear; others are quiet but no less powerful for their impact. This is the first time I've chosen, instead of tearing my title organically, to carefully cut it out in a 19th-century fashion. I'm a bit shocked this has never crossed my mind to do, with the thousands of pieces I've made in the last quarter-century!


The first layer of resin is poured.


The title is laid, and will float, suspended, in the center of the mix.


48 hours later, I can continue work on the piece. I drill recesses into the four main compass-points of the spigot in which to set opals.


The opals in place. Now to complete the resin structure.


A large mold I made earlier will become the dome of the lens.


It's a delicate operation to join the two resin halves together without air bubbles being trapped.


Pressure is applied and the piece remains clamped to set for about 72 hours.

My attention can now turn to the delightful, if extreme, choice of hanging elements: a Victorian-era masonic ceremonial sash, which I slightly modify to feature the spigot as its 'medallion.'


The almost impossible intricacy of the sash seems to lend the focal point a pathos it didn't have on its own. I love them together. After completing the back of the piece (I sadly did not have my camera to record this part), it calls itself done.

To view the finished piece:
http://www.lobue-art.com/four.html

Or, for purchasing information:
http://www.keithlobue.com/product/neckpiece-four-and-what-they-did-2014

 Thank you for joining me!


Wednesday, January 22, 2014

LIFE'S RECORD, In Progress, Part 2.

Last time we sat down together I was ready to create a wooden body for the inside of the fork's 'bowl.'


Getting roughed out.


A large hole is marked and two points where I will recess the wood so the fork will 'set' some dichroic glass beads I'd like to use.


After that is prepped, I mark out where I'll be able to peek through the fork tines.


Now turning back to the fork, I create lateral piercings to accommodate two more of Mira's teeth.


These teeth are set in place as well as the glass beads.


The wood is now painted a deep brown.


My hope here is to build a chamber that will contain several more of my daughter's teeth, while having an active rear view. This lens with plated brass housing is almost pitched back in the pile when I spot an uncanny fit that keeps it in play:


This small pocket watch face slots inside the lens assembly as if it were made for it.


Now the fitting is ground down save for three small tabs which will prong into the wood body.


The lens fitting is sealed to make it watertight, and a beautiful 1860's color lithograph becomes the face of the face, as it were.


A nest of teeth are affixed in place with resin. They will next be completely encased in the resin once all elements are together and ready.


One of my resin lenses is made for the hole in the fork, and sea urchin spines are arrayed around it. These spines will share the resin bath with the teeth.


A last minute decision is made - as the resin is setting in the lens fitting, I apply pressure the center of the crystal, shattering it, but the lens remains in place.


Next an engraving is selected that will peer out from the fork's tines.


The hands, holding a mask, become the image surrounding the watch face on the back of the piece.


An inscription is made and tiny opal set...


...and keys are riveted to some beautiful antique green elastic cord.


My wild-card choice is to use waxed linen thread between the pendant and cord. This last shot of color and texture finishes the piece out.

To view the finished piece and to see Mira enjoying it:

http://www.lobue-art.com/lifes_record.html


See you next week for a piece that, even by my standards, is over the top!

Keith