skip to main |
skip to sidebar
One of my New Year's resolutions has been to dig deep into my trove of treasures, and to pull out those things I've coveted but held back for something 'special.' Turning 50 in January has brought home what I knew intuitively all along:
It's all special.
So out comes one such piece ready for transforming:
An 1890's swivel locket by Pinchbeck. I'm determined to use the original ambrotype portrait within as part of the final piece.
Ambrotypes are emulsion on glass, and must be backed with black for the image to be seen as a positive.
Checking out the swivel action.
The missing side, lost to time.
Out comes the ambrotype... This one is indeed unique as it was hand-colored beautifully and subtly.
The black paint is scratched off the back of the glass, thereby making all parts of the image that would be black become transparent.
Leaving a bit of black behind the face to keep it readable from the front.
My title for the piece is now chosen and I fit it to the oval.
As these brooches were used as mourning pieces, usually enclosing hair of a loved one, I decide to plait a waxed-linen border around the image.
Turning my attention to the empty side, I settle on a spectacular gilt book cover from the early 1800's as my palette.
Cut and edge-painted, I then burrow two recesses to hold jewels.
Gorgeous opals peer out.
A resin lens is prepared and attached.
A brilliantly colored lithograph lends me the face to be seen under the lens.
Almost ready to attach.
First the back must be prepared, as I'll be able to see through the ambrotype to this side of the book cover. I choose some exquisite robe detailing from an 1830 engraving. This texture will reveal itself as the jacket detail of the photo portrait once it's in place.
To secure the glass ambrotype in place, I use more of the thick engraving paper as a 'washer' - this was a practice actually used during the period.
I'll have a shallow space for material to move behind the photo image. I choose to fill this space with tiny tourmalines and mustard seeds.
The edges of the book cover, which are beautifully dense cardboard, are hammered hard to round off the edges, giving the panel a finished quality I'm delighted with.
The panels all in place, the last step is to embellish the exterior frame of the brooch. I choose more of the crimson waxed linen thread, and it imbues the piece with a crude hand-hewn aura.
Now, if you'll saunter over and view the finished piece here.
Or, if you're feeling your oats, you can see how much it costs to wear it yourself here.
Thank you so much for looking and for your feedback below!
Keith
Welcome back! Early on in the making of the shoe piece, I created a braided cord to use as the necklace. Let's see that now, as it will come back into play as the visual of the whole thing falls into place...
I start with a Celtic money ring from around the 3rd to 1st century BC. The off-white thread I'm using here is some spectacular antique rayon, yellowed with age.
I've made this kumihimo plate designed after Makiko Tada's original plate design.
The flat braid appears. It's a zig-zag anda-gumi pattern.
And finished with another money ring. The discoloration of this old cord makes this my favorite braid I've made yet. If anyone out there has decrepit old discolored thread or cord that they want to donate to my obsessive new practice, please get in touch and I'll cover the shipping!
Now back to the pendant. Now that the sole work is in place, I can focus on what will nestle behind the glass, both the upper lens and the lower fused glass. Starting with the fused glass at the toe end, I take a eucalyptus seed cap and search out an engraving to occupy it.
A fantastic Australian scrapbook from the 1870's. Lucky this was unbound and decaying...
When she's mounted behind the glass, it should read as a sort of thought-bubble over the woman's portrait...
...like so.
Now for the top lens. Taking note of all the fabrics and textiles working their way into the piece, it occurs to me to include some antique lace or doily work into the background of the lens chamber. But as soon as my eyes fall on this small bit of tatting, I know this is to be used as a grille through which I will view another face. The center circle is even the same diameter as my lens!
I couldn't have fabricated a better fit...
A portrait of Gabriel Dumont will peer from the stitching.
I now set about searching for a title, through my collection of about 5000 accumulated titles from antique books, newspapers, etc. I've learned to be patient through this process, and not to force any associations in advance, but to go with my gut when it appears.
After exhausting my title file, I begin thumbing through complete books in my collection, hoping to find a connection there.
And there she is. No wonder she was so hard to see! The piece jumps vividly to life in my mind now - amazing how the trail of clues leads me to this life I've assembled.
Now to design a plate with the title to integrate into the form.
Space allowed to pass under the green kumihimo braid.
Cutting the plate.
Type written on and ready to etch.
Just out of the etchant.
Forming the plate on the work.
Sitting aside waiting its turn to climb aboard.
Now I treat the little boot with a high-end saddle dressing - this thirsty leather hasn't seen nourishment for over a century. New, rich color is brought up out of the leather.
I sit the plate in position and start mulling how to lash it down.
Thanks for staying with me. In the final installment: the boot gets laced, the back gets some serious attention, an unusual clasp is devised and it's a wrap.
Hoped you enjoyed yourself.
Keith
Welcome back. In the last post, I created my first digital work on glass, then began the process of developing a stage-like machine in which to view it.
The mechanism of the piece is very important, as I want to see the motion of several wheels as the glass is raised and lowered. And for the first time, I am going to be making all the machine parts by hand, rather than using found objects. Combined with the found elements - the box itself and the candelabra base, I hope to make it a genuine parlor device.
A pulley system is what I need, so using my quick sketch as a guide, I make a careful rendering in Photoshop of the pulley wheels, referencing the crank I'd made earlier so they'd all work visually together.
 The image of the pulleys is glued to my brass sheet, as with the crank, and I ready to drill and pierce the negative spaces out.
 My trusty Dumore begins the work of drilling. I want a car with this wrinkle-paint finish.
 Looks like I'll have my work cut out for me. I wish, actually.

 Cutting out and shaping the mahogany discs that the brass wheels will embellish.
 Creating an inlay area.
 Dyed New Zealand paua shell is then sandwiched between the brass and wood. Here, the first of the four pulleys coming together and viewed on the drawing for the backing plate.
 And the backing plates being prepped to cut out.

 The tiny chain that I envisioned using as a drive belt would need some guides to be fed through so it wouldn't rub on anything. Here I'm bending some brass tubing for the job.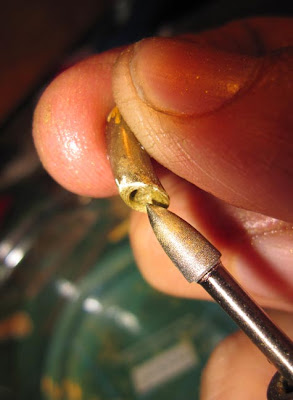
 These little shapes will mount at the top of the structure for the chain to suspend the glass from.
 One of the large pulleys about to get riveted together..
 Brass wire getting decorated as one of the support rods.
 The little brass guides are soldered in place at the top.
 After all this prep it's a rush to sit the elements together so as to see the general structure taking form.
 Setting it up as I pictured it in my drawing, the pulleys seem awkward in this position. This is why my sketches, when I do make them, are really rough and it's assumed they act merely as a launching pad, rather than a technical blueprint. I move the pulleys down the sides until the whole composition has the right balance. What a thrill to be working on something so large after my long absence from making larger work!
 Looks like it will work well, but there are a lot of unknowns ahead. Setting it all aside for now, I set about assembling the two side pulley structures.


 Curling the ends around to straddle the pulleys.
 One side finished, I can't resist feeding the chain through and pulling it back and forth to see the pulleys operate. Good so far.
Next week: fabricating the chain reel & cranking system, and deconstructing the box. Tune in!
Keith


 Posts
Posts


