Some projects lie close to the heart from the inception, and form more as an act of joy than anything proscribed or pre-meditated. This may well be the piece of artwork with the longest gestation period of any in my career.
Sixteen years ago I made a promise to my then-newborn daughter Mira: on your sixteenth birthday, I will make a wearable work incorporating your baby teeth. So I worked diligently in collaboration with the Tooth Fairy, collecting the tiny jewels as they fell like ripe fruit from her little mouth.
The years have flown by, and I find myself in the delightful situation of locking myself in Studio Stuffsmith to actualize this long-held promise.
My generative impulse kicks into gear as I choose for the opening gesture an implement of eating: this beautiful Art Nouveau serving utensil set made from an early plastic called Pyralin Ivory. The fork is particularly pleasing as my housing, and I set upon it.
The bowl is separated from its handle with a quick cut from the jewelers saw.
The raw end is now shaped to a decorative terminus as I opt to have that end as the bottom of the piece.
Scooped from behind,
...and polished. The visual and textural similarity to tooth enamel is striking, and prompts the first tooth out to play.
Although some have been squeamish of the idea of using teeth in jewelry making, there is a long and venerable history of the practice throughout the ages and in many cultures, all the way to the present day.
I have always felt that teeth are the most jewel-like parts of the human body; sheathed in enamel and resistant to corrosive forces. The key for me here is to avoid the piece becoming too macabre or ponderous, while indulging Mira's aesthetic leanings towards Gothic fashion.
The substantial molar takes center stage here, as I choose the placement. This also marks the back of the fork as the front of the piece. I'm chuffed by the color integration of these jarringly different materials.
Now, Dentistry, Lo Bue-style.
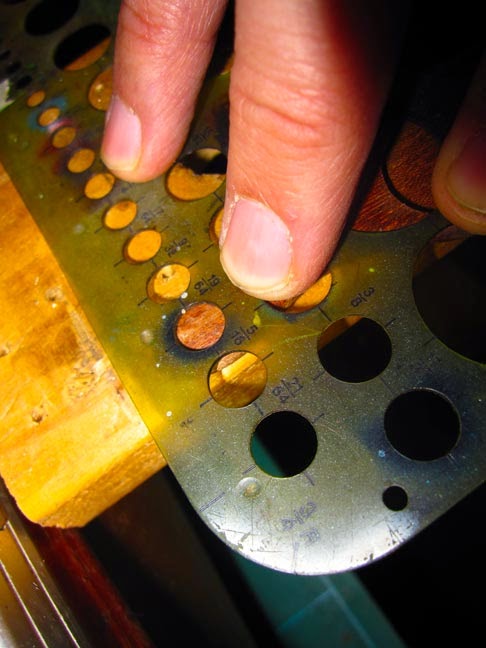
A circular 'bezel' is drilled into the center of the molar to affix a jewel later.
Now to hollow out a recess for the molar to inhabit.
Wet work with a diamond bur.
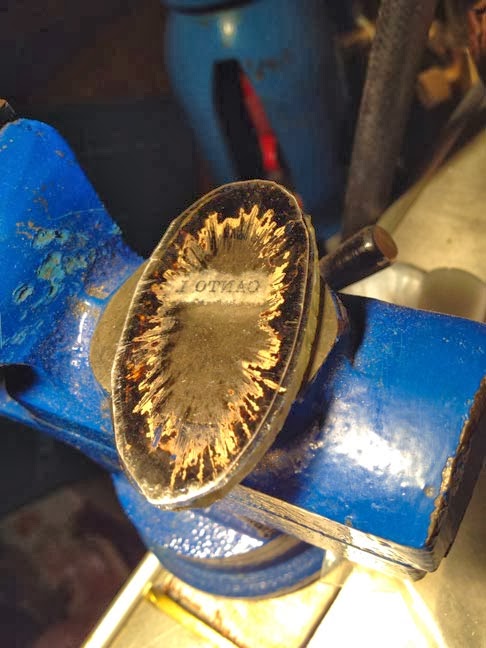
The shape made, it is now decorated with radiant lines and pierced with setting holes.
Now an aperture is decided upon and drawn in place. I cast the lens to the left from resin.
Despite the respirator during this sawing, the scent of camphor fills the studio as the early, organic plastic gives way.
I decide at this stage to create a solid body that will fill the cavity (pun intended) of the fork. Keeping my children close, I choose this slat from my younger twins' crib to perform the function.
Join me next time as I set Mira's teeth on edge, as it were!
Ciao
Keith
Saturday, January 18, 2014
Saturday, January 4, 2014
CANTO I. In-Progress - Part 3.
Here we go - I'm taking this through to completion...
I'd like to mount a tiny gemstone into the body of the mirror - this small steel pocket watch gear will become the bezel, and so is annealed in preparation.
The hole is drilled...
...and the gear riveted into place with a tiny amethyst on either end.
Now a sharp left turn here as I develop a hanging mechanism for the left side of the pendant. The old glass and brass pin is netted in waxed linen thread and two 'selvagee straps' are created. These are tiny cousins to the sailors' rope rings used for various tasks aboard a vessel. I like the visual shock of a softer material harnessing all the metal and glass.
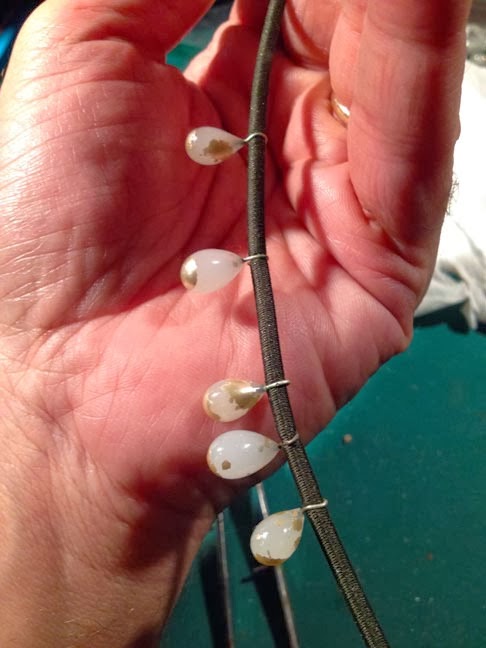
A recent find of a trove of very old glass costume drop beads comes into play here, as I crimp them into the long lengths of 1940's elastic cord that will act as the hanging material.
The other end will have a clasp of sorts (a feature certainly not needed, due to the long cord, but one I like to incorporate when feasible).
The cords are riveted into the keys.
Final connections are made. The key and waxed linen talk to each other, each speaking their own language.
For CANTO I purchasing information:
I'd like to mount a tiny gemstone into the body of the mirror - this small steel pocket watch gear will become the bezel, and so is annealed in preparation.
The hole is drilled...
...and the gear riveted into place with a tiny amethyst on either end.
Now a sharp left turn here as I develop a hanging mechanism for the left side of the pendant. The old glass and brass pin is netted in waxed linen thread and two 'selvagee straps' are created. These are tiny cousins to the sailors' rope rings used for various tasks aboard a vessel. I like the visual shock of a softer material harnessing all the metal and glass.
A recent find of a trove of very old glass costume drop beads comes into play here, as I crimp them into the long lengths of 1940's elastic cord that will act as the hanging material.
The other end will have a clasp of sorts (a feature certainly not needed, due to the long cord, but one I like to incorporate when feasible).
The cords are riveted into the keys.
Final connections are made. The key and waxed linen talk to each other, each speaking their own language.
The last of the glass beads are affixed, and the piece is complete.
This has closed out my 2013 and set the stage for more exploration in the coming months.
For CANTO I purchasing information:
For the complete set of images of CANTO I:
Thank you for coming along for the ride!
Saturday, December 28, 2013
CANTO I. In-Progress - Part 2.
Welcome back! Work continues on this unusual structure, which as you can see, now sports a name...
To mount an attachment to the left side of my scissor handle, I need to anneal the steel first, as it is quite hardened tool steel.
This beautiful and very old glass-topped pin is chosen as my attachment. I've owned this little object for twenty-five years. Feels nice to bring it to bear now.
Drilled through and inserted into the scissor. I love the angle.
The pin is curled around very slowly and is now a useable connection to the pendant.
To make tiny eye-pins to attach chains to my mirror structure, I carve little 'hand-wrought' style nails.
Chains are added and the general form works for me. It has a great movement.
Attention turns now to the wooden mirror itself.
The silvered backing is selectively removed to allow my imagery to be framed by the mirror surface.
The 'paddle' end is pierced to allow a two-sided visual.
I select as a facial image an engraving of 19th-century British philosopher Jeremy Bentham. A fascinating man in his own right, but memorable for many years to me for his request that his body be dissected and then presented as an 'Auto-Icon', where it sits today. You can read all about him here and see an interactive 360˚ view of the Auto-Icon here.
If I've been able to lure you back from your macabre detour, the mirror is prepped.
The title for the piece is now chosen, as I've got a pretty rounded-out vision of what is coming together. 'CANTO I.'
Preparing the back of the mirror 'stack', here choosing an early 19th-century patent-application engraving and adding my signature to be seen from the back of the piece.
Mica is cut as the back window of the stack.
As the stack of glass, image and mica come together, I make one of those wild-card decisions that make me trust my intuition.
The mirror is lightly scored and cracked in two places. To my delight, the tiny fragments of silver dot the area under the eye like tears.
Time to drop the mirror structure into the bezel of brass.
The tabs are delicately pushed over the wood, with a thick pad of felt underneath to protect the glass elements as well as the wood, which is quite brittle with age.
The pendant portion of the piece is now, except for one detail I'm about to add, complete.
Join me one more time as I work out a typically unorthodox method for hanging the pendant. Thanks for joining me!
To mount an attachment to the left side of my scissor handle, I need to anneal the steel first, as it is quite hardened tool steel.
Drilled through and inserted into the scissor. I love the angle.
The pin is curled around very slowly and is now a useable connection to the pendant.
Attention turns now to the wooden mirror itself.
The silvered backing is selectively removed to allow my imagery to be framed by the mirror surface.
The 'paddle' end is pierced to allow a two-sided visual.
I select as a facial image an engraving of 19th-century British philosopher Jeremy Bentham. A fascinating man in his own right, but memorable for many years to me for his request that his body be dissected and then presented as an 'Auto-Icon', where it sits today. You can read all about him here and see an interactive 360˚ view of the Auto-Icon here.
If I've been able to lure you back from your macabre detour, the mirror is prepped.
The title for the piece is now chosen, as I've got a pretty rounded-out vision of what is coming together. 'CANTO I.'
Preparing the back of the mirror 'stack', here choosing an early 19th-century patent-application engraving and adding my signature to be seen from the back of the piece.
Mica is cut as the back window of the stack.
As the stack of glass, image and mica come together, I make one of those wild-card decisions that make me trust my intuition.
Time to drop the mirror structure into the bezel of brass.
The tabs are delicately pushed over the wood, with a thick pad of felt underneath to protect the glass elements as well as the wood, which is quite brittle with age.
Join me one more time as I work out a typically unorthodox method for hanging the pendant. Thanks for joining me!
Tuesday, December 10, 2013
CANTO I. In-Progress, Part 1
Hello and glad to be back in the step-by-step mode of bringing you with me into a new piece.
The kick-off is this miniscule Victorian wooden hand mirror, most likely made as a doll's accessory. I've been nurturing this object for a long time and its time has finally come.
I love the upside-down orientation, so that's where my instinct starts me.
Time to remove the mirror.
Now I'm setting about cutting a small hole in the bottom of the handle and making a glass lens to fit.
This glass was melted in my kiln and will now be used as the lens.
Cut down, tapered...
...and polished.
My next major element is brought in - a 1940's brass coaster with the glass center removed. I cut the ring to enable me to shape it.
After deciding to form-fit the coaster brass to the mirror, I set to work.
So far, so good. Slow work.
The forming finished and soldered together, I can now turn to working out how to further modify and join them.
I'm going to make tabs that will fold around the wooden mirror, which will also serve to greatly reduce the depth of the piece.
Roughed out and ready to be finessed. At this point I'm thinking about hanging possibilities, while it's still in a rough state.
This fantastic steel-and-brass scissor handle is cut down and will make a perfect asymmetrical top to the pendant.
The right side chain is anchored to the brass body. The form is really taking discernable shape.
Join me next week to see where I'll take it. Comments are welcome!
Ciao!
Keith
The kick-off is this miniscule Victorian wooden hand mirror, most likely made as a doll's accessory. I've been nurturing this object for a long time and its time has finally come.
I love the upside-down orientation, so that's where my instinct starts me.
Time to remove the mirror.
Now I'm setting about cutting a small hole in the bottom of the handle and making a glass lens to fit.
This glass was melted in my kiln and will now be used as the lens.
...and polished.
My next major element is brought in - a 1940's brass coaster with the glass center removed. I cut the ring to enable me to shape it.
After deciding to form-fit the coaster brass to the mirror, I set to work.
So far, so good. Slow work.
The forming finished and soldered together, I can now turn to working out how to further modify and join them.
I'm going to make tabs that will fold around the wooden mirror, which will also serve to greatly reduce the depth of the piece.
Roughed out and ready to be finessed. At this point I'm thinking about hanging possibilities, while it's still in a rough state.
This fantastic steel-and-brass scissor handle is cut down and will make a perfect asymmetrical top to the pendant.
The right side chain is anchored to the brass body. The form is really taking discernable shape.
Join me next week to see where I'll take it. Comments are welcome!
Ciao!
Keith
Subscribe to:
Posts (Atom)